


I really like the look of topiaries. They add a nice touch of elegance and whimsy to any table/party decor. They can be a simple centerpiece for a wedding and make a nice statement depending on how crazy you get with the glitter, the base that is used would make it appear more formal. I created the topiaries in this tutorial for a Woodland themed baby shower.
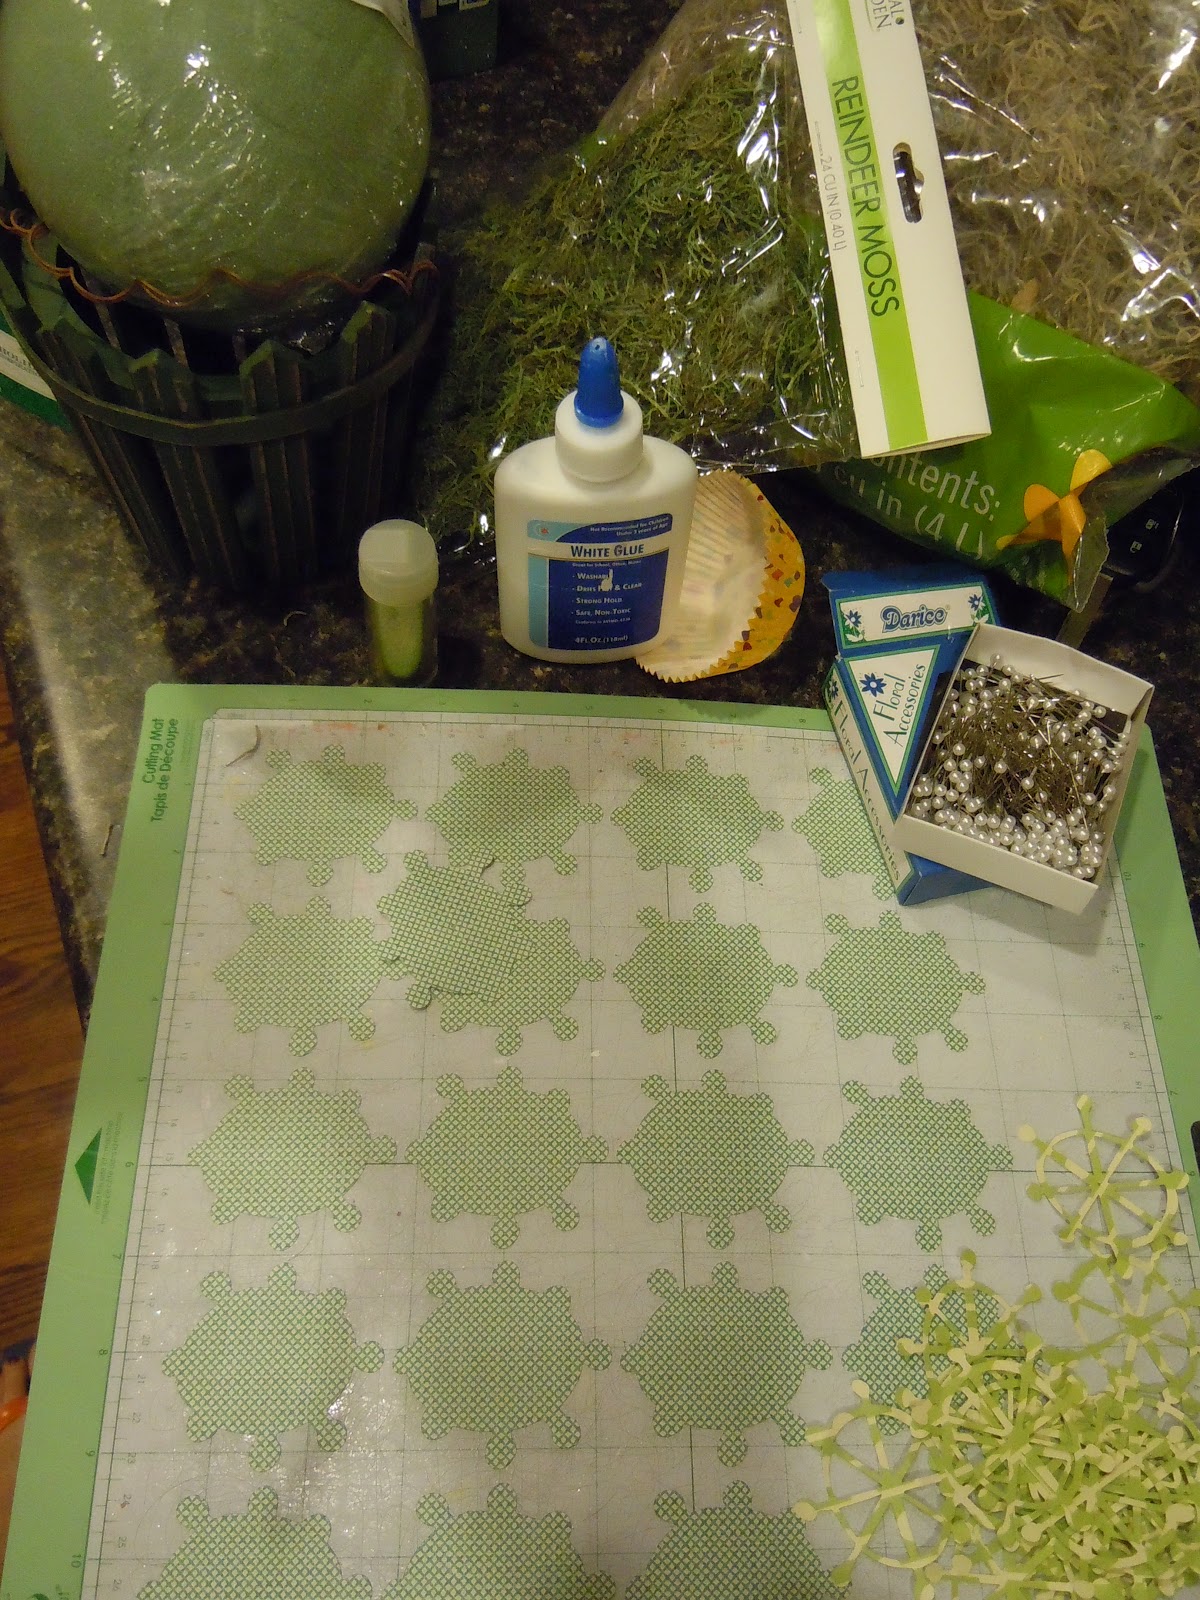
Supplies for 1 topiary:
- 4 sheets of coordinating paper (2 sets of 2 12x12 sheets)
- Paper Punches that will create a layered shadow effect or Cricut (used Give a hoot cartridge)
- Florist pins (aprox 60)
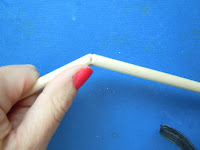
- 1 - 1/4" wooden dowel (or as my husband says wooden rod) cut to 12"
- 1 pot, basket
- 1 5" foam (found them cheap at Wal-mart $3)
- 1 foam block that will fit into your pot. I used 1 block for 2 pots (dollar store find)
- glue
- ribbon
Plain Pearl Florist Pins are used in this topiary:

Make the florist pins shine like glitter... well they are covered in glitter. Essentialy, you dip the pearl end of the pin into glue and then into the glitter color of choice. These particular topiaries are for a boy themed party. I am hoping that the mommy-to-be will consider keeping them for their Woodland themed nursery. I decided to get rid of the pearl look by covering it in glitter. For another set I am creating, I will leave the pearl alone.


Punch out your paper. As mentioned, I used the Cricut "Give A Hoot" Cartridge. You could also use coordinating paper punches as well.

\

Continue adding more flowers until the entire ball is covered.

Here is the topiary just hanging out in the basket with out the dowel. This would be a neat idea to make a "mum" looking plant for in the fall.

Cut the wooden dowel to 12".


Take your choice of ribbon and add a bow or charm to the dowell.
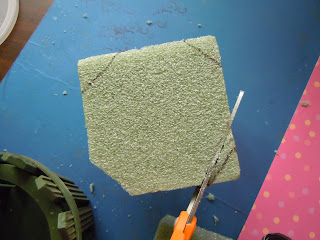
Shape and size your foam block for the filler for the pot - this is what holds everything upright.

 Place the 2nd foam block (cut to size ) into the pot, container, basket.

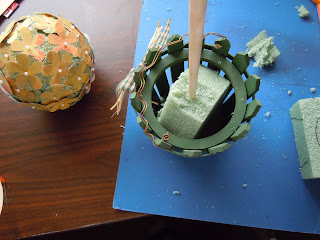


Add moss to cover the foam block inside the pot.

Here is the same topiary hanging out in a wooden basket. I didn't add a bow at the top because I thought the bow in the bottom was enough


Take your choice of ribbon and add a bow or charm to the dowell.
Shape and size your foam block for the filler for the pot - this is what holds everything upright.


Insert topiary on the dowel into the foam. If you are transporting these already made to the party/wedding reception, I would recommend placing glue into the newly created hole in the foam foam and reinsert the dowel for extra keeping power.

Insert the wooden dowel that has been cut into the decorated foam ball, just slighty scoot the pretty layers away to create a space for it.


Add moss to cover the foam block inside the pot.

Here is the same topiary hanging out in a wooden basket. I didn't add a bow at the top because I thought the bow in the bottom was enough

I added the little felt birds to the pot for decoration.

This crafting moment will link up to the following blogs and link parties.
http://www.scrapscene.com/tag/wipmonday.html
So cute! Great tutorial ... stopping by from the Kurtz Corner Tuesday Tutorial Linky Party. :)
ReplyDeleteThanks so much for stopping by! They were a lot of fun to make. I want to give it a stab again at Christmas time!
DeleteI love topiaries also. This is very different and so lovely. Great tuorial - I might even try it!! I once did a topiary with small faux rosebuds. It took forever and my hands were killing me after I worked on it for a few hours (then I had to take a rest before starting again!). I had to take a break so much - that I never completed it (hate to admit it because I am not a quitter by nature). I'll have to try it your way.
ReplyDeletePlease take a look at my project that I linked up on the Cowgirl Up on The Farmhouse Ranch. I did the Ceiling Design and Room R-Do.
Also - I noticed that you had a link at the bottom that linked to your link parties page. I will have to try that - because I hate it when I have to separately list them in the project post. Anything special that I have to do? I noticed you had something that said scrap something as part of the link.
Thanks
Linda
Linda - Hey there! Thanks for stopping by. I am going to go check out your page in a little bit. I have to get the kiddos off to school.
DeleteI saw the tutorial on the rosebuds --- so pretty and I was wondering about how long that would take. Probably won't take a stab at it now after your reviews. I am not a huge quitter but my plan to make "6 of something" would be greatly reduced to "only two"
You can create a page on your blog and have all of the buttons listed - click on the "html" tab and past there. Then add a back link to your page. The "scrapscene" website requires a back link in the actual post versus a linky page (as I have created) or a sidebar (of which is another option). Good luck with what you decide to do and if you make these, let me know!
Great tutorial! They turned out very nice.
ReplyDeleteTotally, totally cool! And lovely subdued colors! I like the topiary look too and I'm gonna steal your idea. Meanwhile, I make my BF buy me a real one from time to time (you can see my last azalea tree here http://meehameeha.blogspot.com/2012/04/home-office-sneak-peek.html). Cheers!
ReplyDeleteThanks for popping by to take a look. If you end up making them, let me know! I love azalea trees. I always seem to kill them but love the way they look!
DeleteThis looks so easy! Thanks for sharing at Terrific Tuesdays.
ReplyDeleteRachel
adventuresofadiymom.blogspot.com
Rachel - Thanks for stopping by and thanks for hosting another great event!
DeleteWhat a fun and noteworthy idea. Love the shapes you chose for this project. Thanks for sharing on Becolorful this week.
ReplyDeletepam